blog 1 (laser cutting documentation)
Hi everyone! 😌 Welcome to my first blog, where I’ll be sharing with you on my experience using a laser cutting machine! (COOL RIGHT?)
Here is a summary of the contents I’ll be talking about in my blog:
1. The 4 important hazards associated to the operation of laser cutting machine and their respective safety control measures (administrative/engineering control).
2. The materials that can be cut and can’t be cut using laser cutting machine.
3. The steps including pictures on the operation of UNIVERSAL laser cutter, that consist of:
a. Starting the compressor, turning on the laser cutter machine and fume extractor.
b. Importing a .DXF file to CorelDRAW and modify the lines/fill for cutting and engraving.
c. Sending the CorelDRAW drawing to laser cutter software and setting the laser cutter power, speed, PPI in the software.
d. Starting the job on the laser cutter machine.
e. DOs and DONTs when there’s flame/fire on the material being cut.
4. My Learning reflection on the laser cutter activities.
Without further ado, let’s get into the blog! 😎
Firstly, we will be looking at hazards and their control measures:
Hazards | Safety control measures | Pictures to support the explanation |
1. Material in laser cutting machine can catch fire | Engineering: Emergency button is present to cut off power supply to the laser cutter, hence reducing the chances of the fire getting bigger. Administrative: Students are informed about the ways to handle fires (eg. by blowing off/using fire extinguisher/cutting off power supply) beforehand during their safety briefing to minimise any harm to user. Administrative: Students are informed to observe the material constantly and not leave the laser cutting machine unattended. This ensures that any material caught on fire can be detected almost immediately. |
 |
2. Smoke being inhaled, hence causing lung related problems to the user. | Engineering: Fume extractor is present with an in-built filtration system where it passes through carbon filter to remove any unpleasant odours. It also consists of an in-built air filter that releases clean air to the environment, instead of smoke from the laser cutter. Administrative: Students are informed to turn on the air compressor and the fume extractor before turning on the laser cutting machine to continue operations. | |
3. Staring into the laser beam of the laser cutting machine may cause vision issues | Administrative: Students are informed to occasionally glance at the material and NEVER to stare into the laser beam | |
4. The laser cutter may come into contact with the user | Engineering: There is a lid present on the laser cutter that prevents any direct contact between the laser beam and the user. When the lid is lifted, the laser cutting machine will no longer be in operation as the power supply would be cut off. Administrative: Students are informed beforehand to NEVER touch the laser beam of the laser printer during their safety briefing. | |


Laser cutters are not able to cut through all materials, as certain materials may pose a harm to the user if it is exposed to the laser. Hence, there are materials that are approved materials to be used in laser cutting, while some other materials are not approved.
MATERIALS THAT CAN BE ENGRAVED/CUT USING LASER CUTTING MACHINE IN FABLAB
Material | Photo of material |
1. Paper/ White Card |  |
2. Cardboard |  |
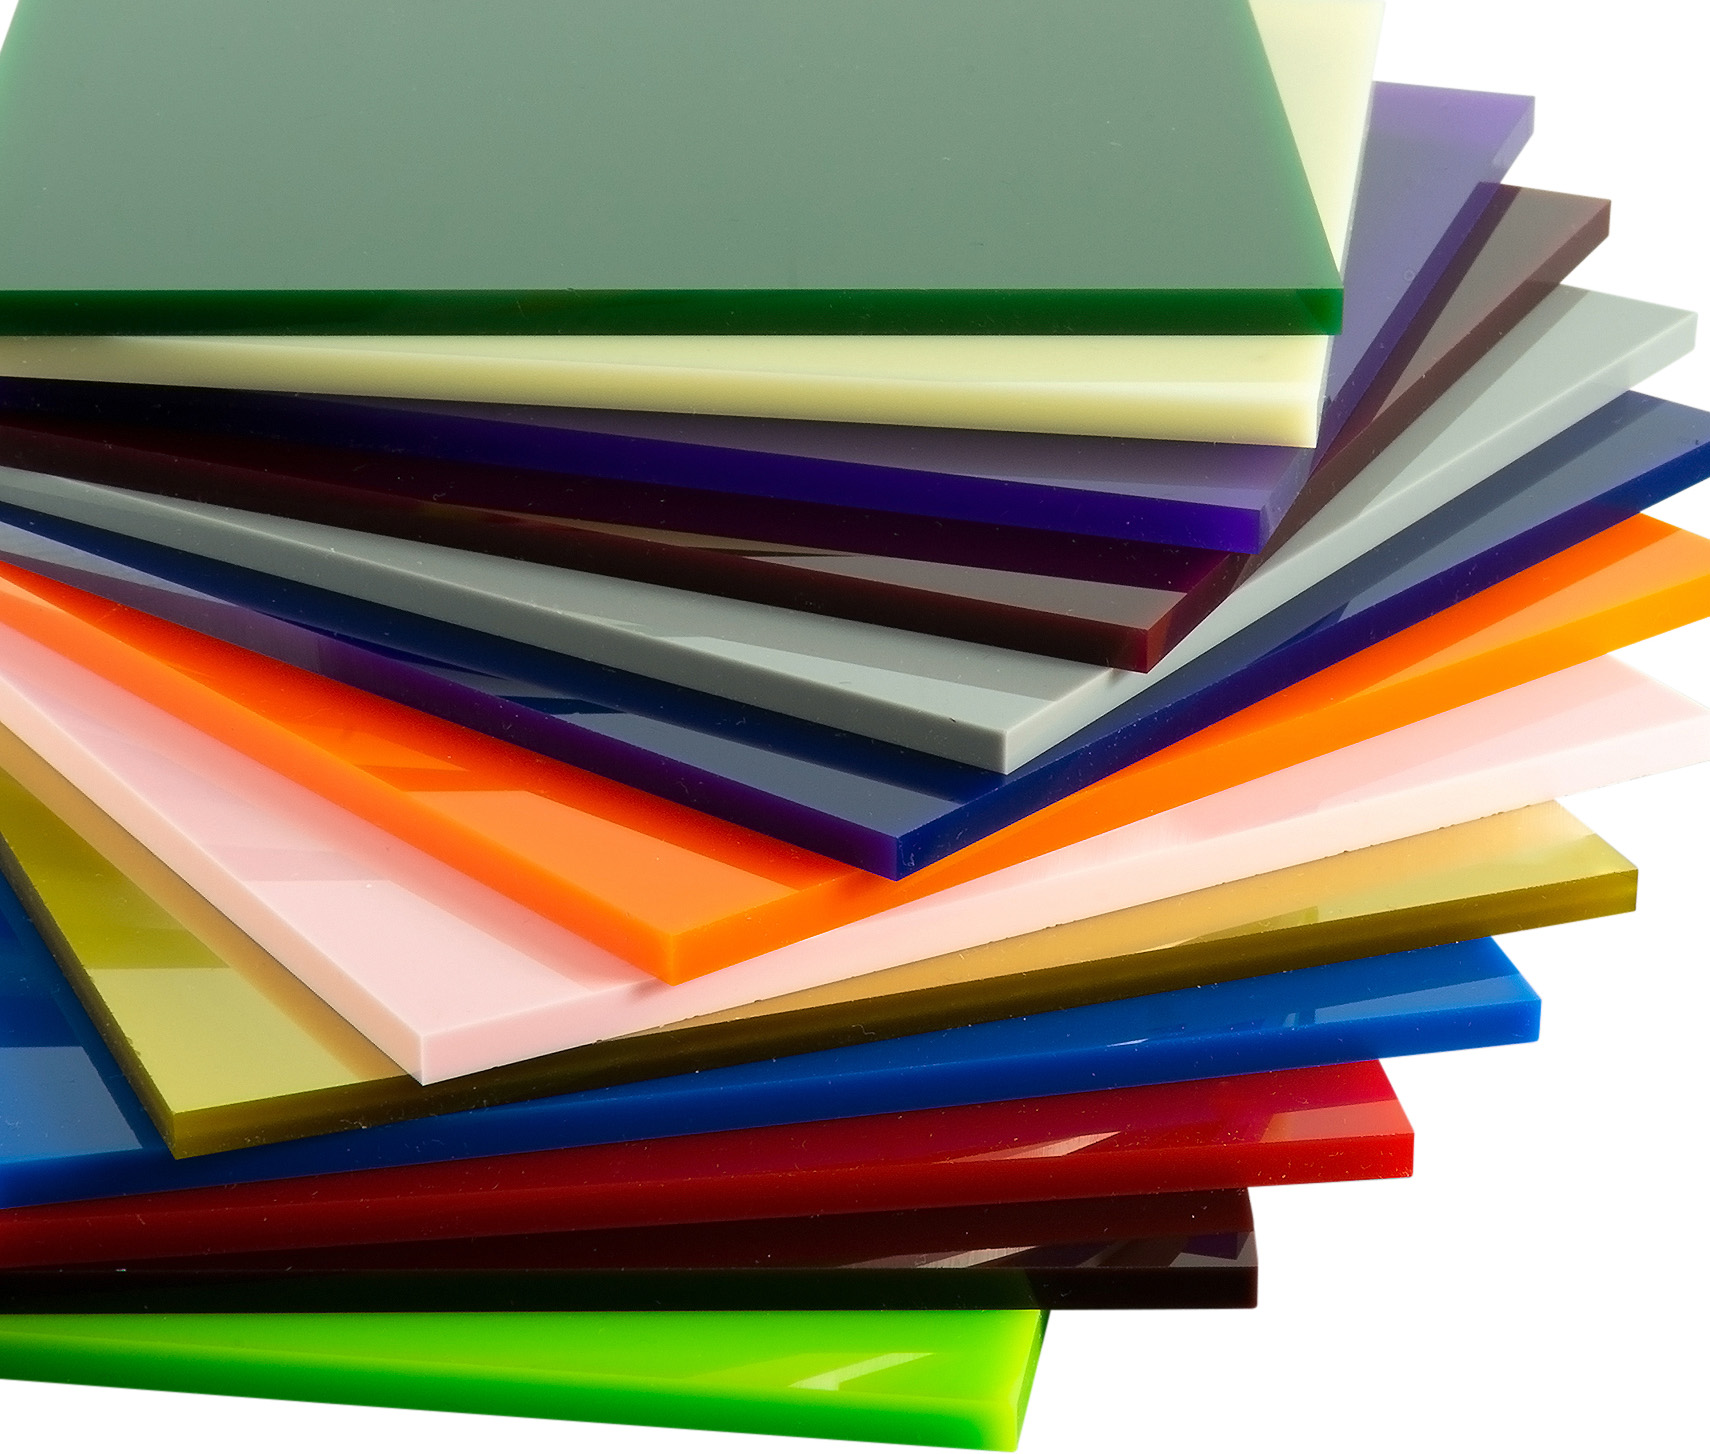
3. Acrylic | |
4. Plywood/ Balsa wood |
 |
MATERIALS THAT CANNOT BE ENGRAVED/CUT USING LASER CUTTING MACHINE IN
Material | Photo of material |
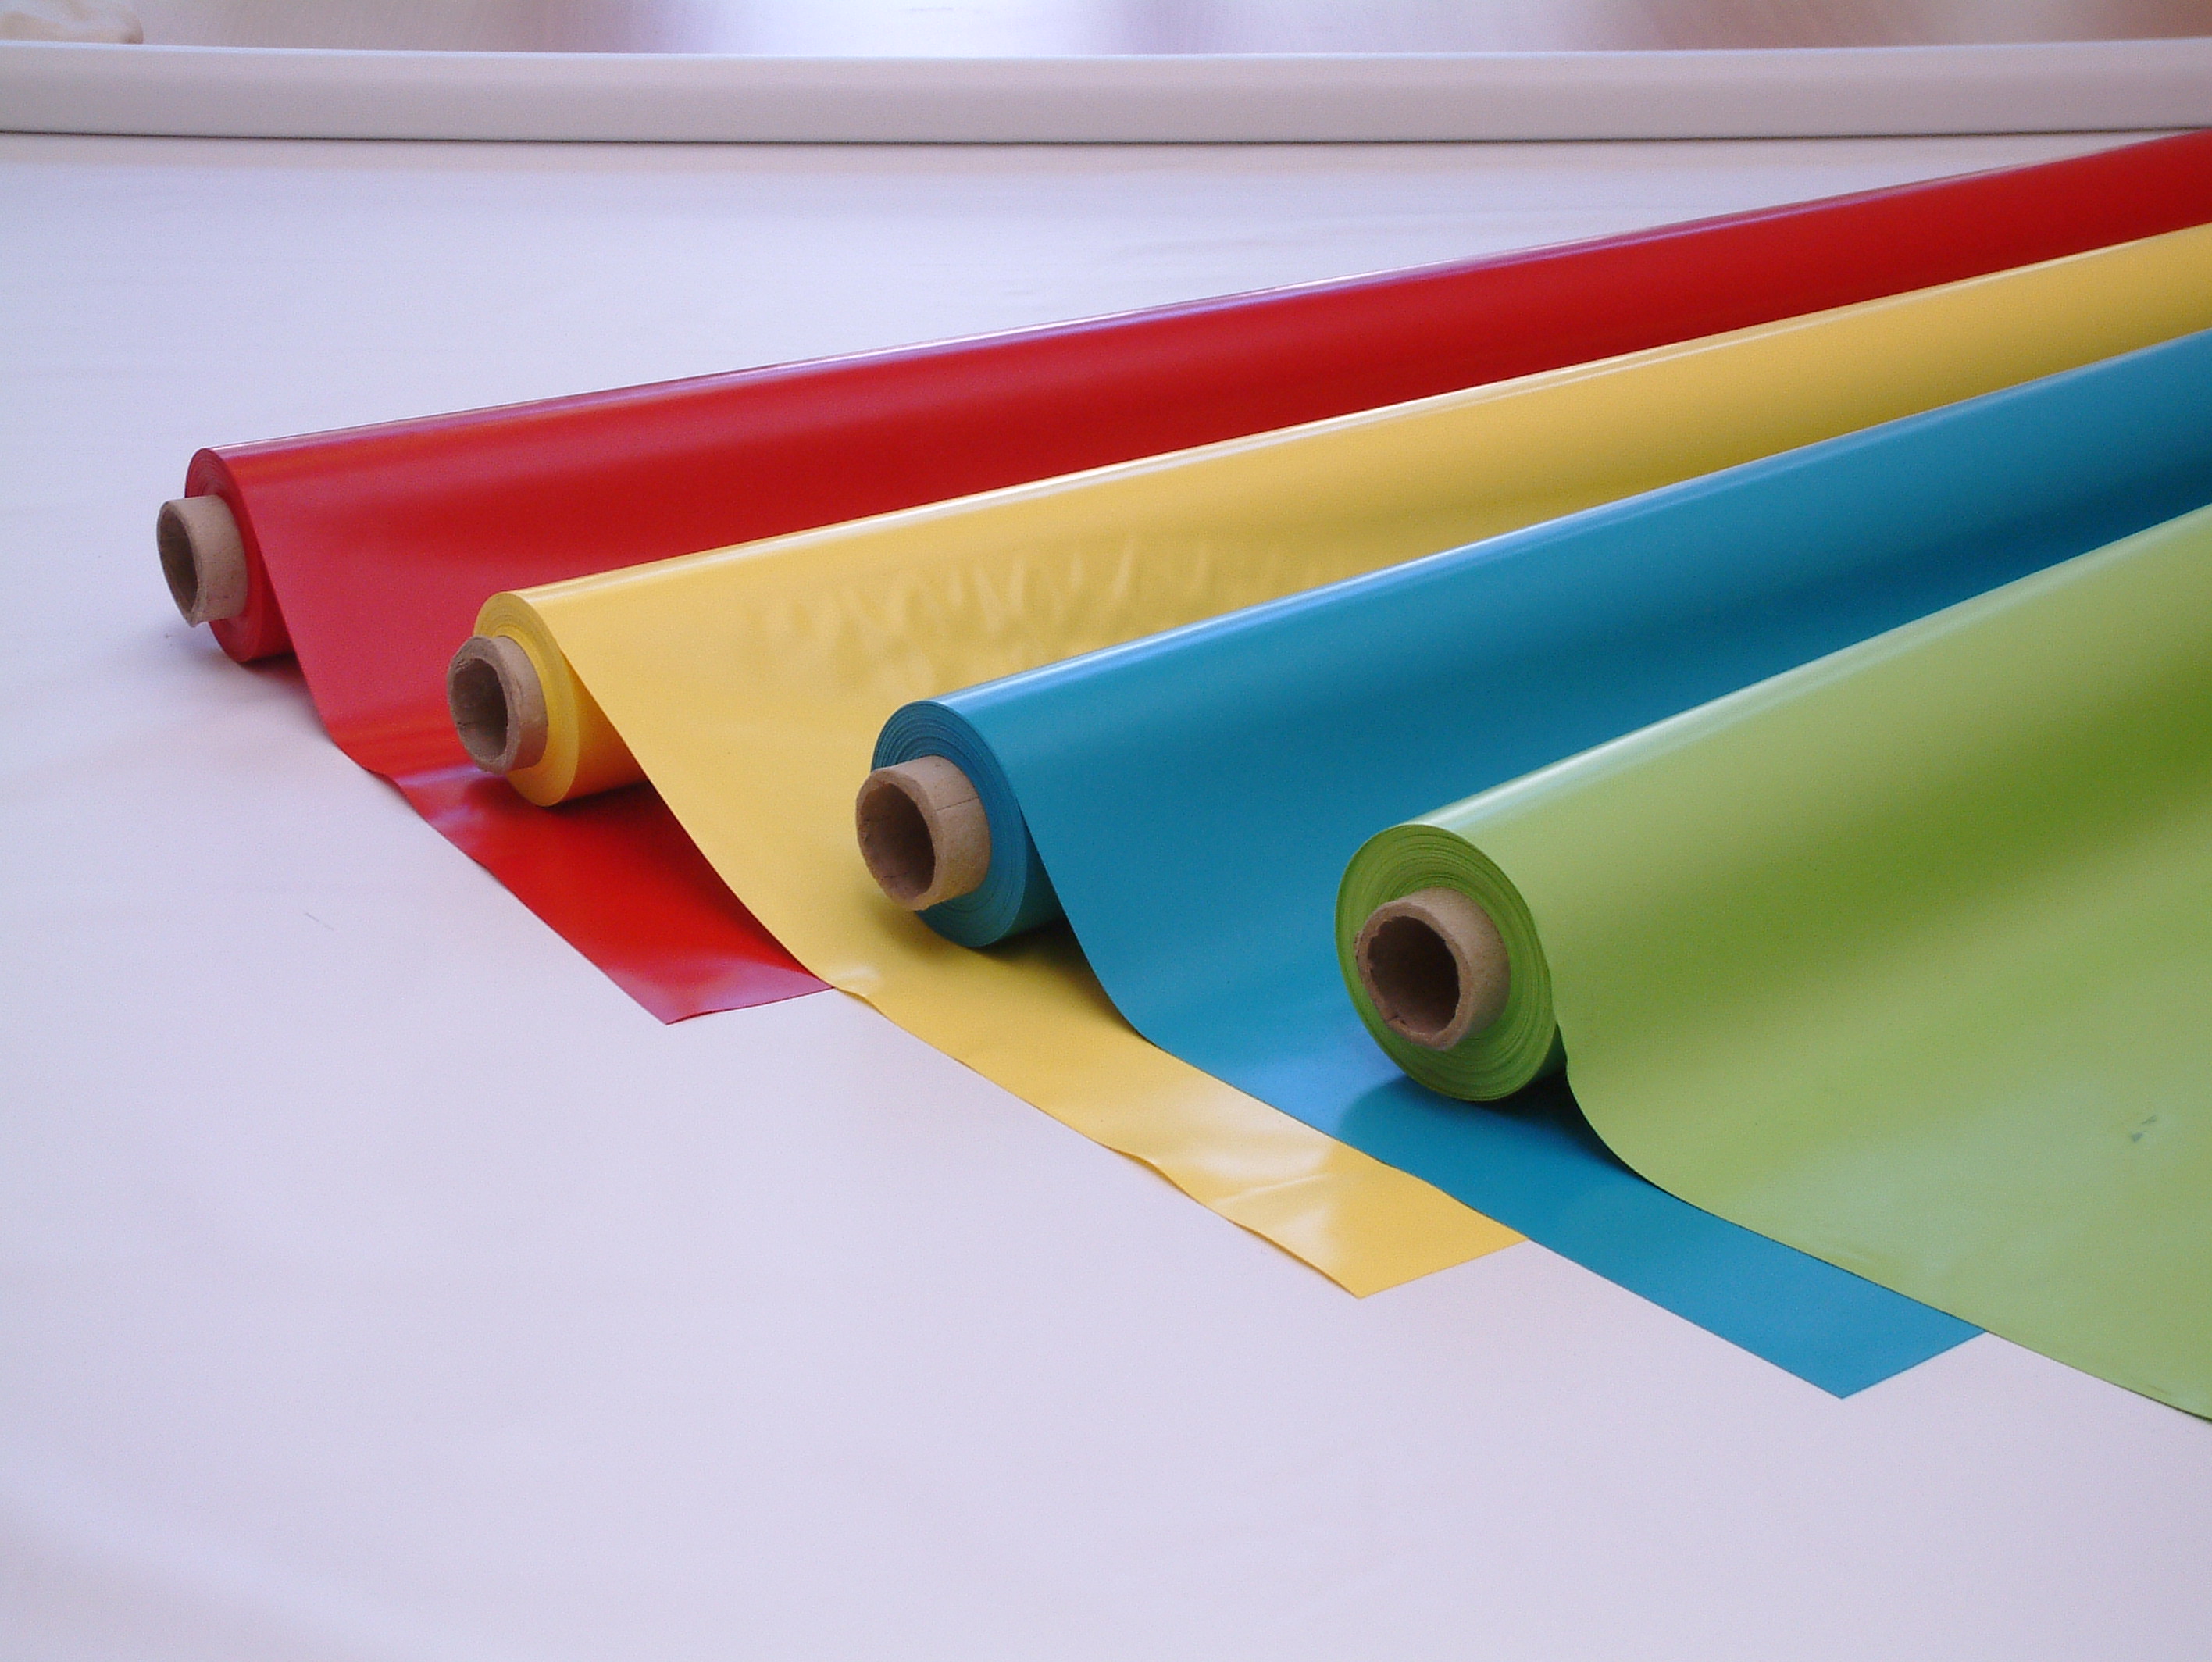
1. PVC | |
2. Metal |
 |
3. Foam | |
4. Rubber | |


Now that we have talked about the safety hazards to take note of when using the laser cutter, as well as the materials we can use, let us now look at the steps on the operation of the universal laser cutter machine.
STEPS ON THE OPERATION OF THE UNIVERSAL LASER CUTTER MACHINE
(a)
- Before using the laser cutter, turn on the main power switch for the laser cutter, fume extractor, air compressor and light switch.

2. Next, turn on the fume extractor to prevent the accumulation of smoke and gases in the laser cutter.

3. Then, turn on the air compressor that aids in removal of smoke and debris from the laser cutter.

4. Lastly, turn on the universal laser cutting machine by pressing the power button.

(b)
- To import file from fusion 360 to corel draw,
Select File > Import > Select your .DXF file and press import.

2. After importing the DXF file, select line colour and width to create either vector engrave, vector cut or engrave.

*RED - (R:255 G:0 B:0)*
*GREEN - (R:0 G:255 B:0)*
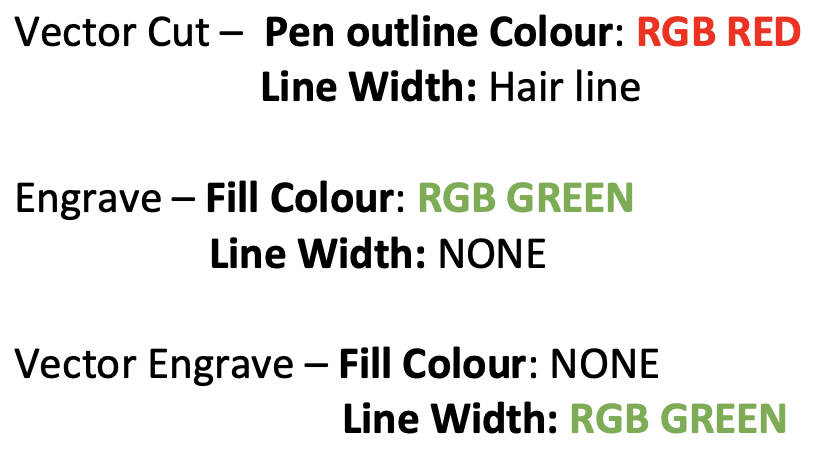
3. For Vector cutting or Vector engraving, line width and colour can be adjusted. For vector cutting, select the outline pen icon (bottom right of screen) and change the line width to ‘hairline’ and select ‘red’ for the colour.
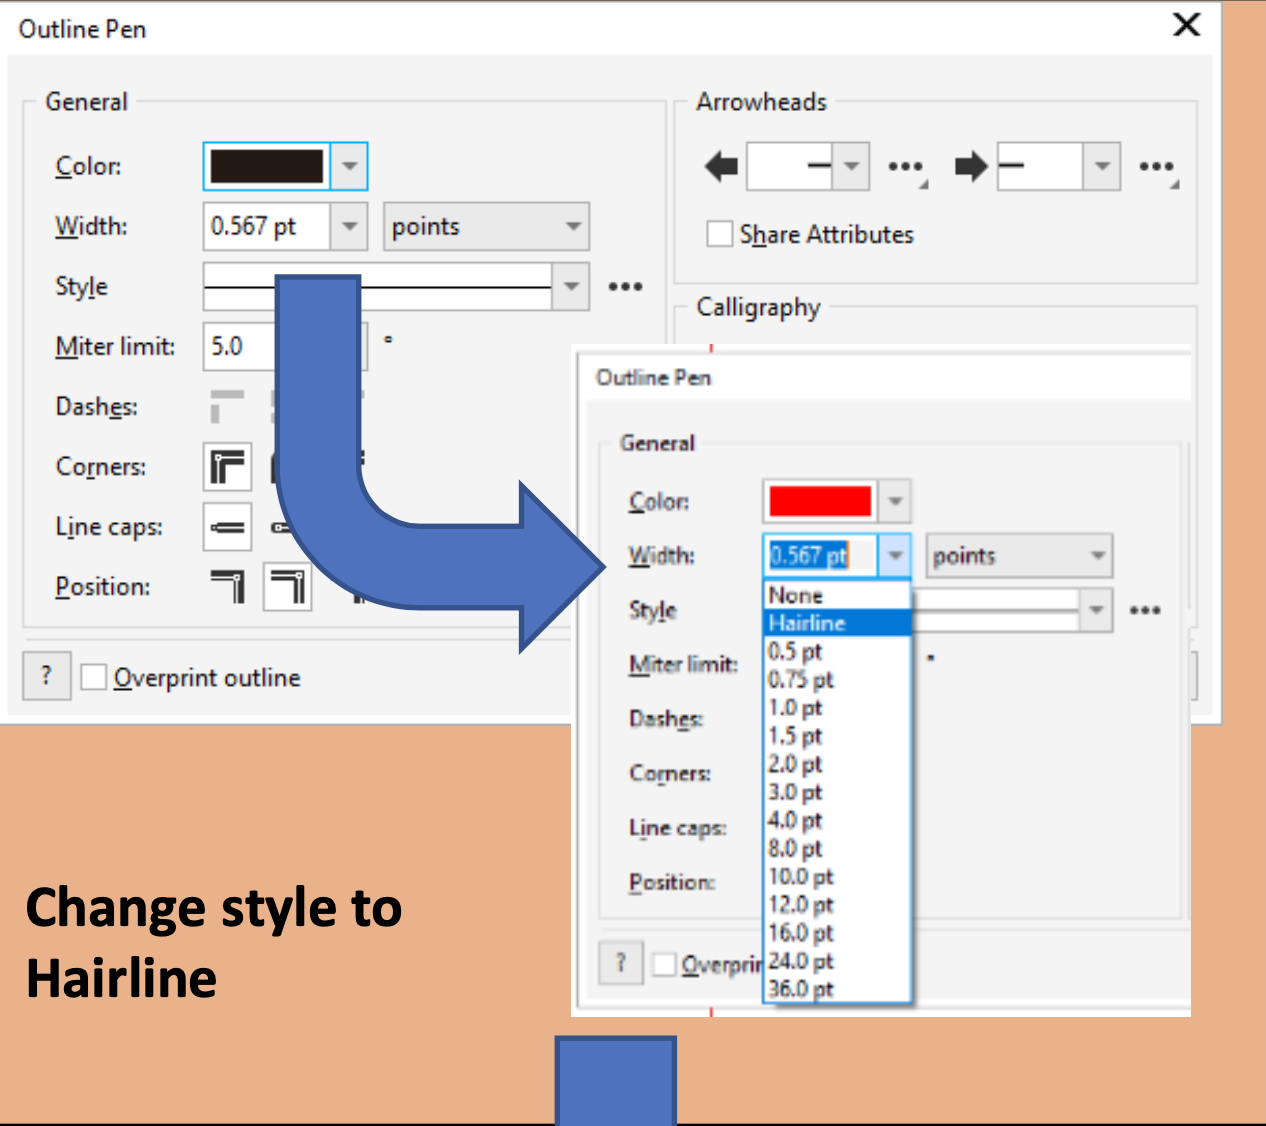
Then, specify the style to ‘RGB’ and input the appropriate values for vector cut (R: 255 G:0 B:0)

4. To adjust the fill colour for ‘engraving’ setting, click the fill icon (bottom right corner) and edit the ‘name’ into green under the uniform fill section.

Then, input the appropriate values for ‘engraving’ setting (R:0 G:255 B:0).
(c)&(d)
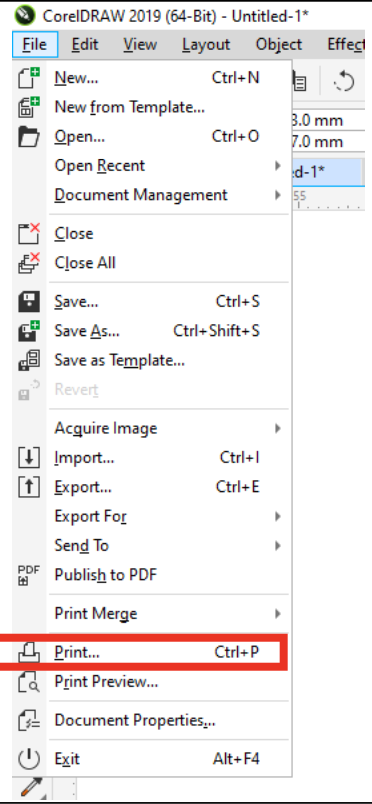
1. After inputting the settings, it is ready to be sent for laser cutting. Click on ‘file’ and then on ‘print’.
2. Then, click on the Cogwheel for settings.

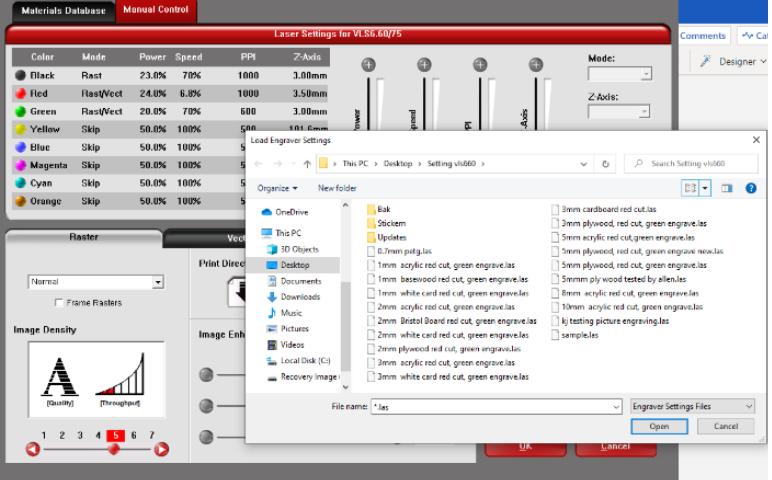
3. Then, the Universal setting will appear. Proceed to click on ‘LOAD’ for more material settings. Select the presets that match your material type and thickness. Select ‘OPEN’

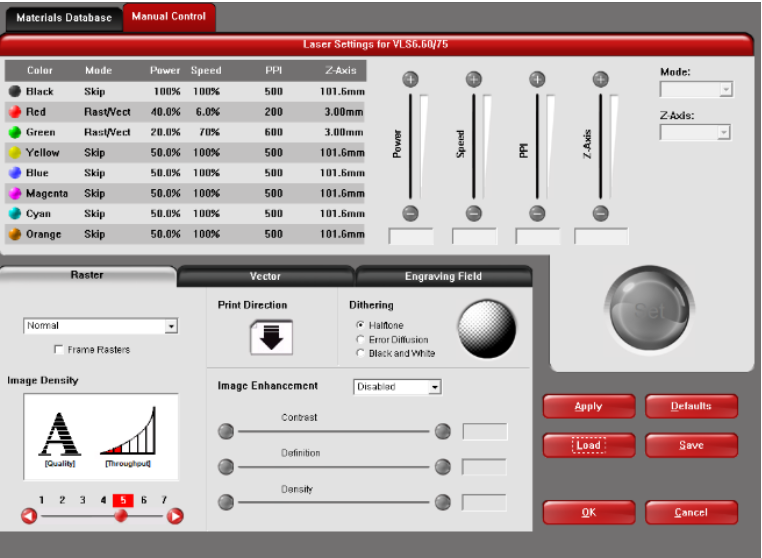
4. Before cutting, check for the power, speed and PPI settings.
9. On the Universal Control Panel (UCP), we will check the Horizontal and Vertical sides of the built-in ruler and use the ‘MOVE’ tool to move the object to the empty space of the plywood. (Click on the focus tool and crosshair appears)
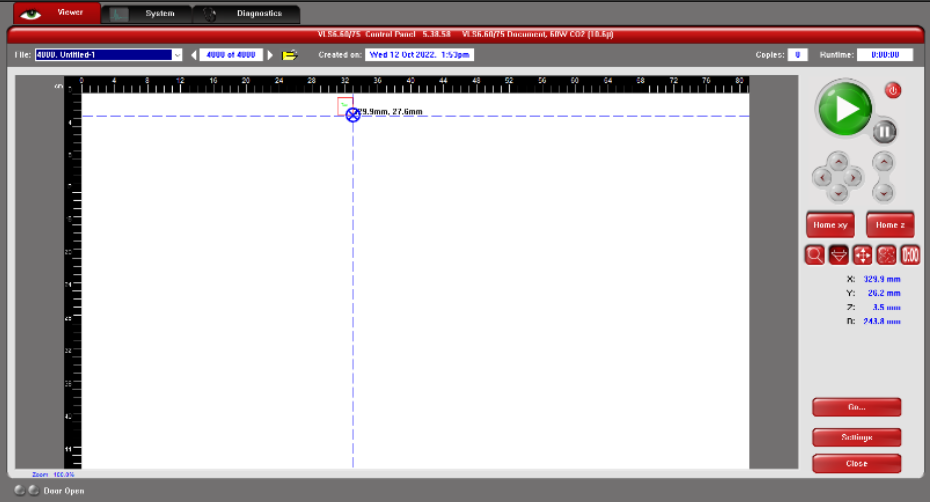
10. With the lid open, check if the file is within a safe cutting area.
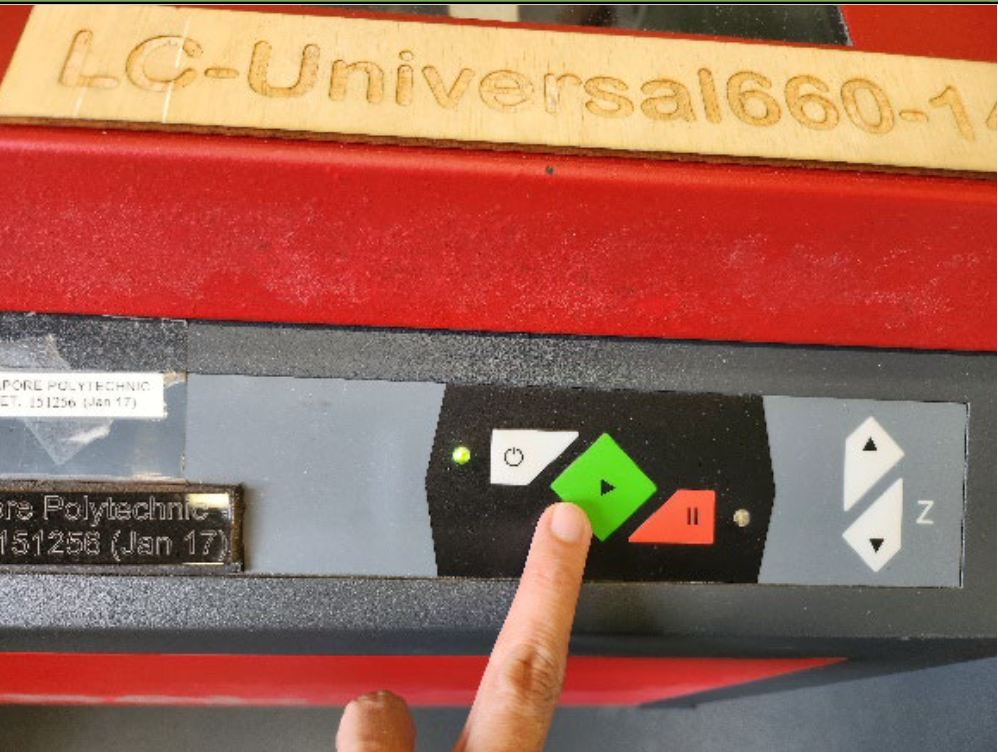
11.When done checking, click ‘OK’. Then, shut the lid gently before proceeding to activate the laser cutter and to start cutting, press the ‘play’ button. (To pause the cut/engraving, click the ‘pause’ button)
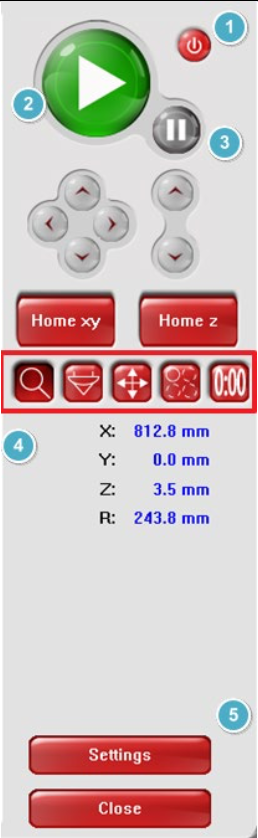
(Click ‘settings’ to change/set settings for different material)
Once the process is over, let the extractor remove the toxic smell and particles first before lifting the lid of the universal laser cutter. It is recommended to wait for 1 minute as a safety precaution. Then, remove any unwanted materials and dispose them appropriately before deactivating the laser cutter!
(e) Dos and DONTs when there’s a flame/fire on the material being cut
DOs
- Ensure that you actively watch the laser cutter at ALL times due to the fact that material might catch fire.
- When cutting materials, small fires may be expected. However, if material stays on fire, (more than 1-2 seconds), lift the laser cutter and stop the cutting operation. If fire is negligible, put it out by blowing it off. IF FIRE PERSISTS, remove material from the laser cutter and step on it to put out the fire.
- IF FIRE IS UNCONTROLLABLE, go to the closest fire extinguisher and put it out. Get people’s attention by shouting for help.
DON’Ts
- Do not leave a laser cutter unattended when in operation.
- Do not keep quiet about the fire. Inform the staff in charge immediately.
Comments
Post a Comment